two

Sunday, 31 August 2014

September 2014 - Amy Cheadle from Northern Dough Company


Say Hi everyone to Amy Cheadle one half of the talented Northern Dough Co Pizza dough company (the other being Chris her husband), who lovingly create artisan frozen dough so you can create a superior pizza at home. Available at various farmers markets, quality food outlets and also from Booths,Waitrose and Ocado, this is a Lancashire food business success. Amy is currently cooking a little dough ball all of her own which is expected any day soon so she managed to fit in answering our questions whilst resting at home.

Their ready to roll bases are available in four flavours, original, wholemeal, rosemary and chilli they have a base to suit all tastes. Self confessed pizza addicts they love what they do and the product they have created.


Northern Dough Co


Recently featured in BBC Good Food Magazine as a face of Clitheroe food festival the team are a regular feature of local food shows.

So on to our questions, so what makes Amy tick .....


  •      What is your favourite cookery, food book or publication ?
There’s so many cookbooks I love – I have Delia’s ‘How to Cook’ where I learnt the basics and find Jamie’s fresh flavours and simplicity great for everyday, but one of my favourite times of the month is when my foodie mags pop through the door and I can sit down and leaf through the seasonal recipes – I cut out my favourites and keep them as an ongoing scrapbook to refer back to on a regular basis. Olive, Delicious and BBC Good Food are all delivered to the door.
  •         What sentence sums up Lancashire Food to you ?
Hearty, homely and comforting – food that brings family and friends together.
  •         If you weren’t doing what you do now, what would you like to be ?
I absolutely love working with food, but my long term dream is to write a novel, so I’d love to spend my days in a cottage in the countryside gazing over a lovely view and coming up with plots – food would have to feature heavily though!
  •         Which piece of kit could you not do without ?
My pizza peel – it makes getting a pizza in and out of a hot oven on a stone really easy and is always a talking point when people come over for a pizza party. They’re not expensive though, about £10 or so for one that will last a lifetime.
  •         Who would join you at your ultimate dinner party and why?
My ultimate guest would be Roald Dahl, his stories fired my imagination as a child, The Witches was my favourite and I thought it was delightfully frightening that you could be turned into a mouse by eating chocolate and sweets! I’d also invite a true Neopolitan pizza chef and the team at Bake Off – Mel and Sue as they would provide the entertainment and Paul and Mary to keep me on my toes and make sure my baking was up to scratch!
  •         What advice would you give to your younger self ?
That setbacks are critical to finding the very best solution. Sometimes at the time things not going the way you planned feels tough, but in hindsight I’ve always learned far more from situations that I’ve had to approach for a second or third time – challenge inspires innovation and that’s what keeps things interesting. (This doesn’t however apply to my driving test, which took 9 attempts to pass!)
  •         Describe your style in three words
Currently its comfortable, cool and expandable as I’m 8 months pregnant but usually its pretty much summed up as classic – whether it be fashion, food or at home, I love the basics but keeping things fresh with a little twist here and there.
  •         What was your latest foodie gadget purchase ?
A Kitchen Aid pizza wheel, it was ludicrously expensive given you can pick up a similar gadget for a few pounds, but it slices through any pizza/ topping like a knife through butter and at food shows we can cook 50 pizzas a day and cut them into 30 mini slices for sampling, so efficiency is a must!
  •         What is your greatest achievement to date ?
Creating a brand at our kitchen table and getting into onto supermarket shelves nationally within two years. We started the business with a small sum of money left to my by my late Grandmother, who was renowned for her larger than life personality and strong work ethic and it makes me very proud to think of the delight she’d take in our success. I also love when people are surprised that as a husband and wife team, people think that Chris and I would drive each other crazy living and working together – its quite the opposite, I can’t imagine anyone I’d rather run a business with.

  •         What is the worst mistake you have made ?
Making things overcomplicated – at our first food show in 2011, we were making samples so people could taste the pizza dough freshly baked. I devised an elaborate list of different toppings, and tried to re-create them on the stand only to find that it was an absolute disaster and meant timings were all over the place. Since then, we opt for tomato and mozzarella and let the dough speak for itself – I also always look to Chris to simplify things, he’s great at seeing through the detail and pulling out the one or two key elements that are important.
  •        Tell us a secret about yourself ? may be something we wouldn’t expect !
There’s not much in the food world that I don’t enjoy – sweet, savoury, all the cuisines of the world and food is always a huge part of holidays and day trips wherever I am. Not a secret, especially for someone working in the food industry, but if someone was to offer me a last meal ever, it wouldn’t be lobster or fillet steak, I’d head to a chippy in Preston city centre and order chips, cheese and gravy and sit on a bench outside to eat them, covered in vinegar! It was a student staple years ago, and still something I crave as comfort food.


Dough sticks

Northern Dough Co

Monday, 25 August 2014

Courgette loaf - gluten free


I knew I couldn't get through another summer without creating a new courgette cake recipe. This one is gluten free and uses one of my favourite vegetables for baking with. I always have plenty of courgettes to experiment with from the garden.

Courgettes are great for gluten free baking as they add additional moisture to the bake, something that gluten free bakes often lack, this is due to most gluten free flours having a good quantity of rice flour in them which robs moisture from the mixture.

Makes 2 x  loaves

What you need
  • Oil spray and loaf tin liners
  • 380g gluten free flour
  • 1 tsp baking powder
  • 2 tsp xanthum gum
  • 1 tsp bicarb
  • 2 tsp mixed spice
  • 2 tsp cinnamon
  • 225g caster sugar
  • 3 eggs
  • 240ml vegetable oil
  • 2tsp vanilla paste
  • 220g courgettes - finely grated
  • 1tbsp Greek yogurt (optional)
What you do 
  • Oil spray and line two loaf tins
  • Pre heat the oven to 160c
  • Grate the courgettes ( I use a food processor), don't squeeze the moisture out
  • Mix along with all the other ingredients in a food processor or mixer
  • Pour into your prepared tins
  • Bake for 50 -55mins until well risen and golden, test with a skewer
  • Cool in the tins initially and then on a cooling rack
  • This freezes well when wrapped in foil
  • Serve plain and or simply iced

As host of bake of the week this week I am linking to Bake of Week, created by Helen at Casa Costello 

                                                         Casa Costello


Bake of the Week w/c 25th August 2014

Casa Costello

The lovely Helen over at Casa Costello is currently on a well deserved holiday so we are excited to be hosting and babysitting "Bake of the Week" whilst she is away.

I am taking over from Hay in a Day so why not join in the fun by linking up a bake you have made this week and also check out the round up from last week.

So calling all cake fanatics and baking lovelies! How do you fancy showing off your creations each week?

So just as Helen does I am posting my bake of the week and I invite you to do the same.
Add your blog post link to the linky underneath my Bake of the Week post and lets admire each other’s creations.

All types of baking are welcome – savoury bakes, biscuits, breads, cakes, tarts.

All entries are pinned to the Bake of the Week Pinterest board, Tweeted (@casacostello @LancashireFood) and Commented on.

There is only one rule: The bake must be yours!! Please add the badge to your blog post to let others know you are entering a Bake of the Week.

So just add your bake to the linky


Thursday, 21 August 2014

Rustic plum cornmeal cake


This summer has been fairly poor for our Marjorie plum tree, a reasonable crop was developing but then we had a freak wind storm, followed by drought and then rain, so I had to do battle with the local wasps to snaffle enough plums to make this cake. I love English plums but the season is very short and unless you can get your hands on a supply from a generous local grower making jam or any type of preserve can be an expensive business.

I decided to make this cake to showcase my plums and combine them with a tasty polenta cake recipe I had been meaning to bake for sometime. The plums impart a delicious moist tang to each slice and provide colour to a very plain bake.


Stunningly simple and very rustic this cake needs no more embellishment than a light dusting with icing sugar.


So lets bake and create a beauty

What you need

  • Oil Spray for the tin
  • Couple of English plums - cut into segments, stoned removed
  • 175g softened salted butter
  • 225g caster sugar
  • 3 eggs - free range, beaten
  • 150g fine cornmeal / polenta (ensure gluten free)
  • 100g gluten free flour - plain
  • 2 tsp xanthum gum
  • 1/2 tsp baking powder
  • Icing Sugar (optional)
Round loose bottomed cake tin - oil sprayed and base lined 

What you do
  • Pre heat the oven to 180c
  • Cream the butter and sugar in a stand mixer until light and fluffy
  • Now add the rest of the ingredients (except the plums and icing sugar) to the mixture and mix until well incorporated.
  • Pour into the prepared tin and artistically arrange to plum segments on the top of the cake
  • Place in the oven and bake for 40-50 minutes until golden, well risen.
  • Cool in the tin
  • Once cool remove from tin and serve (optionally sprinkled with icing sugar)

I am linking up to this months Alphabakes hosted by Caroline Makes and The More than the occasional baker in rotation. This month's them is P - for plums and polenta in my case.


And also bake of the week created by Casa Costello and hosted this week by Hay in a Day

                                                         Casa Costello


Tuesday, 19 August 2014

Blackberries and rose geranium crumble


When the blackberries are starting to ripen on our generous bush in the garden I know that summer is starting to come to a close, crumble is wonderful pudding at all times of year and is liked by most visitors whether served hot or cold. It can be infinitely varied depending on the fruit used under the crumbly crunchy topping. In this recipe we combine juicy blackberries with the fragrant rose geranium to give a slightly perfumed compote.

The combination came about as I wondered what recipes I could use my beautifully fragrant scented geranium leaf plants in, after all I had attar of roses, orange fizz, pink capitatum (lime scented) and Lady of Plymouth (rose mint scented) to try. 


I obtained my scented leaf geraniums from Otter Farm, home to Mark Diacono one time gardener at River Cottage and now Climate Change farmer, Otter Farm has a fantastic range of seeds and plants for sale for the more adventurous smallholder.

Since recently converting to gluten free I thought I'd have a go at making a gluten free crumble mixture, this recipe is great served with yogurt, cream or custard. The mixture will also store well in the fridge in a sealed container so you can whip a quick dessert in a flash, just combining with what ever fruit you have to hand.

What you need to make the scented compote
  • Blackberries 
  • A few rose scented geranium leaves
  • A drop of water
  • 1/2 weight of fruit in sugar (caster)

To make the compote
  • In a pan add the blackberries, sugar, geranium leaves and a drop of water, bring to a gentle simmer until the blackberries are softened then allow to cool. Leave the leaves in the pan with the fruit compote until cold so the flavours have time to infuse.
  • Once cold remove leaves and spoon into ramekins
To make the crumble, you will need
  • 200g Gluten free flour 
  • 100g Softened butter
  • 100g soft brown sugar
  • 50g  Gluten free Oats (if tolerated)


In a stand mixture mix all crumble ingredients until you have a crumbly mixture


  • Now top the ramekins with the crumble mixture 


  • Place in the oven at 180c on a baking tray and bake for 20 - 25 minutes until golden and the juices are rising from the berries.


  • Serve hot or cold with or without cream or custard


Lucky for us most of the ingredients can be sourced from the garden and every year we have  ample quantities of lovely berries so for me this is pretty frugal dish using what we have at hand. For that reason I am linking up to No Waste Challenge, hosted this month by I'd much rather bake than and created by Elizabeths Kitchen and also to Shop Local also created by Elizabeths Kitchen.


shop-local-badge

And Credit crunch munch crreated by Fuss Free Flavours and Fab Food for all , hosted this month by Elizabeths Kitchen.

Credit-Crunch-Munch-


This post is also being linked to The Great British Blackberry Recipe Round Up with Lavender and Lovage and Farmersgirl Kitchen


Saturday, 16 August 2014

Lemon crunch cake


Who doesn't love a lemon cake (well I know someone who doesn't but you get the point), zingy yet comforting at the same time, perfect with a cup of tea whether its drizzling or sunny its a cake standard and one that everyone should have in their arsenal.

I have seen recipes for gluten free lemon cakes which contain mashed potatoes and at some point I will give them a go but this one is more conventional were some of the flour is substituted with ground almonds and the other flours are gluten free. The resultant cake is moist and very moreish, improved by the lemon drizzle topped off by a crunch lemon sugar topping.

Sorghum flour which is in this recipe is a fine  beige white flour from a millet like grain, obtainable on line and in any good health food store. Its a nutritious flour and adds a good flavour to the bake.

What you need
  • 175g melted butter
  • zest of 2 lemons
  • juice of 1 lemon
  • 2 eggs
  • 1 tsp baking powder
  • 25g tapioca flour
  • 40g sorghum flour
  • 150g granulated sugar
  • 60g ground almonds
  • 25g cornflour
  • 25g fine polenta
  • 1 tsp lemon oil
To make the sugar topping

  • 50g sugar
  • 1 tbsp sugar for sprinkling
  • juice of 1 lemon

What you do

  • Firstly lets pre-heat the oven to 170c
  • You will need a 2lb loaf tin, oiled and based lined or use a tin liner
  • Mix all the cake ingredients together in a large bowl, being careful that you melted butter is not too hot, otherwise you will scramble your eggs.
  • Once you have a smooth mixture pour into you prepared tin, smooth the top and place in the oven
  • Bake for 45-55 minutes, until golden, well risen and tests cooked if you insert a skewer
  • Remove from oven and cool in the tin.
  • Whilst the cake is cooling , melt the 50g of sugar and lemon juice in a pan. Once all the sugar has dissolved, pour over the still slightly warm cake and sprinkle immediately afterwards with a further tablespoon of sugar to create a delicious crunchy sugary topping once cooled.
  • Keeps well loosely wrapped and stored in a cool place.


I'm linking up to Hijacked by Twins who is babysitting the Bake of The Week for Helen over at Casa Costello

                                                              Bake of the Week

I'm going to be hosting this challenge in just over a weeks time after Hay in a Day has hosted the challenge

Wednesday, 13 August 2014

Tumbleberry and yogurt iced lollies


Need to cool down, these gorgeous summertime treats are a doddle to whip up and are much better for you than the icy treats you buy from the shop. Made with fresh berries, some sugar and a little yogurt they have just the right amount of fruity tang to creaminess ratio to deliver a very satisfying ice lolly.

For many months I have been searching for the perfect iced lolly mold, ideally my perfect one would be metal where you can use wooden sticks, just like the one I remember from the 1970's from the little corner shop that made vimto lollies in summer. So far I have managed to buy a plastic one where the plastic handles snapped one by one and then a supposedly metal one which turned out to be plastic with a steel finish (and yes I did complain to the manufacturer - who frankly wasn't very forthcoming). So the search continues......

To make tumbleberry and yogurt lollies you need
  • 500ml mixed berries (can be frozen and defrosted)
  • 200-250g sugar (varies depending on mix of fruit you use)
  • 75ml of yogurt (I used a Greek yogurt)
  • Icing sugar
  • Ice lolly mold and sticks
To make the mixture
  • Start by making a over sweetened compote, using the berries, the sugar and just a drop of water to get the juices going in the pan. Once the berries are softened and the sugar dissolved, switch off the heat. 
  • Cool a little and then sieve to remove pips and seeds and any tough skins.
  • Cool and then taste for sweetness, what you are trying to achieve is just a bit too sweet before freezing. If you need to add more sugar then use icing sugar as this dissolves without heating.
  • Once you are happy with the level of sweetness, mix in the yogurt.
  • Pour into molds and insert lolly sticks
  • Freeze for at least 12 hours
Ta dah Tumble berry and yogurt iced lollies, on a hot sunny day you will be popular.

                                                    IceCreamChallenge_thumb1

Laterly we are linking up to Bloggers scream for Ice Cream over on Kavey eats who's theme is Fruity ice lollies, this is perfect.

Sunday, 10 August 2014

French bean, tomato and cumin salad


I love using fresh seasonal produce in recipes and its even better if that produce is freshly picked from the garden. As per usual I am fighting a loosing battle with the courgette plants in the garden and it was whilst picking the a fore mentioned vegetable, I spotted that my lovely golden french bean plants were starting to crop. I find French beans are always better eaten young and the golden variety we are are growing this year is pleasantly waxy.

This is a great dish to serve along side a grilled steak or chicken fillet or just on its own with other salads and has a pleasant aromatic spiciness which is lovely warm or cold, it also usefully uses a few small tomatoes too homegrown if you have those too. It would be a great take along dish for a bbq or party, much more exciting than the standard coleslaw.

What you need
  • French beans - topped and tailed (not too large pods)
  • Butter - a good sized knob
  • Tomato - 1 large or couple of small - chopped 
  • Clove of garlic - crushed
  • Freshly ground cumin - 1 tsp ish
  • Salt - pinch
  • Pepper - to taste
  • Fresh coriander leaves
What you do
  • Simmer the prepared beans in a little salted water until tender, but still with a little body.
  • Drain the beans and place in a small frying pan and cook with the butter, garlic, chopped tomato and cumin.
  • Cook for a few minutes until the tomato pieces are softened, remove from heat, season to taste.
  • Serve strewn with fresh corainder leaves
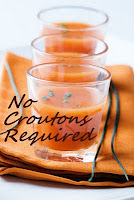
I'm joining in the foodie fun this month over on Tinned Tomatoes for No Croutons required.


We are also linking up to Eat your Greens over at Allotment 2 kitchen


And finally we are linking up to The Spice Trail who's theme this month is Beach BBQ, hosted over on Bangers and Mash.                                                          
spice trail badge square

                              beach barbecue

Friday, 8 August 2014

Rocket, roasted tomato, basil and feta salad

This salad is seriously amazing for two main reasons firstly its tastes great and secondly as it uses plenty of rocket (arugula for our American friends), the reason why I like this is because we have a forest of of rocket growing in the vegetable garden. I enjoy rocket salads as our homegrown wild rocket has a spicy Parmesan cheese edge to its flavour so its great in combination with other Mediterranean salad ingredients. This salad is a mish mash of Italian and Greek flavours and screams languid hot summer days to me.

I am sure I can almost here Spanish guitars and feel Balearic breezes through the trees.....

I am sure if you didn't fancy roasting the tomatoes that some good sun dried tomatoes would be nearly as good in this dish, plus you could swap out the feta for local goat cheese, serve with chilled white wine and good bread, simple grilled meats or fish and good friends.

What you need
  • Rocket (Arugula) - a good handful for each person
  • Basil- a few sprigs - leaves picked off
  • Feta or goats cheese - 1 block serves about 4 - chopped or crumbled
  • 6 - 10 baby plum or cherry tomatoes - halved
  • Extra virgin olive oil ( extra virgin rapeseed would also be good)
  • Sprig of fresh thyme - leaves picked off
  • White wine vinegar / balsamic vinegar / red wine vinegar
  • Pinch of sugar
  • Salt and freshly ground pepper
What you do 
  • Heat your oven to 220c
  • Toss the tomatoes in a little of the olive oil and place in a small oven tray, sprinkle with the thyme and a little sugar and season with salt and pepper.
  • Roast for about 30 minutes or so until the tomatoes are slightly charred and soft (like in the bottom image)
  • Cool ( you can store in the fridge for a while if you like, no snaffling !)
  • iMake a dressing of the pan juices, a good slug of olive oil and some vinegar (you are going for 6/1 oil to vinegar ratio), taste and adjust seasoning if needed.
  • To assemble the salad, toss the rocket in the dressing , then top with the cheese and roasted tomatoes and drizzle with a little more of the dressing.
  • Strew with basil leaves
  • Serve immediately and devour greedily.


I'm linking up to Simple and in Season, created by Ren Behan and hosted this month by Elizabeth's Kitchen Diary.

                                            simpleandinseason
I am also linking to Extra Veg created by Fuss Free Flavours and Utterly Scrummy and hosted this month over at Maison Cupcake.

Extra-Veg-Badge.jpg

Saturday, 2 August 2014

Earl Grey tea loaf - gluten free


Frankly I don't think you can beat a tea loaf, especially one which is Earl Grey scented. This very British bake is great for taking on picnics or in school lunch boxes and the like, it is also better after a couple of days wrapped and stored in an airtight tin.

To ensure a moist tasty cake please soak the dried fruit for at least a couple of hours in the tea so it doesn't rob the cake of its moisture whilst baking, this is particularly important if you are baking gluten free. I have been experimenting recently with mixing my own gluten free flour rather than relying on ready mixed and must say that I am impressed with the results being achieved.

Earl Grey tea dates from the 1830's and is reputed to be named after the Prime Minister of that time, a black tea with the addition of the oil of the bergamot orange.


What you need
  • 275g Dried mixed fruit (raisins, sultanas, cranberries, apricots are all lovely)
  • 125ml strongly brewed Earl Grey tea
  • 90g softened butter or quality vegetable margarine
  • 125g golden caster sugar
  • 180g plain gluten free flour
  • 1 tsp bicarbonate of soda
  • 1 1/2 tsp baking powder
  • 1 tsp xanthum gum
  • 125ml warmed skimmed milk ( I use the microwave)
  • 2 eggs - free range
1 x 2lb loaf tin base lined or use a liner (I pick them up from the local £1 shop)

What you do
  • Soak the fruit in the strongly brewed Earl Grey tea for at least 2 hours
  • Once the fruit is soaked and swelled then you are ready to bake
  • Pre heat the oven to 160c 
  • Beat the softened butter and sugar together in a large bowl or use a mixer.
  • Once soft light and fluffy add the rest of the ingredients except the dried fruit 
  • Mix until well combined, then fold in the dried fruit
  • Pour into the prepared tin and place in the oven
  • Bake for 50 -60 minutes, the cake is ready when a skewer inserted comes out clean
  • Remove from oven and allow to cool for 5 minutes in the tin, then cool fully on a wire rack
  • Once fully cool wrap in foil to store
  • Fabulous serve buttered or on its own.


As this cake is perfect picnic food I am linking up to Tea Time Treats whose theme this month is PICNIC FOOD, a blog challenge hosted by Lavender and Lovage and Hedgecombers.

                                         August Tea Time Treats: Pack up a Picnic! Picnic Food & Picnic Treats


Hearth & Soul Hop

Casa Costello